The Liftopia.com homepage provides several ways to search for tickets or browse by region availability.
1. You can use the dropdown to select a region or state or you can scroll down to "Popular ski destinations" to make your selection.
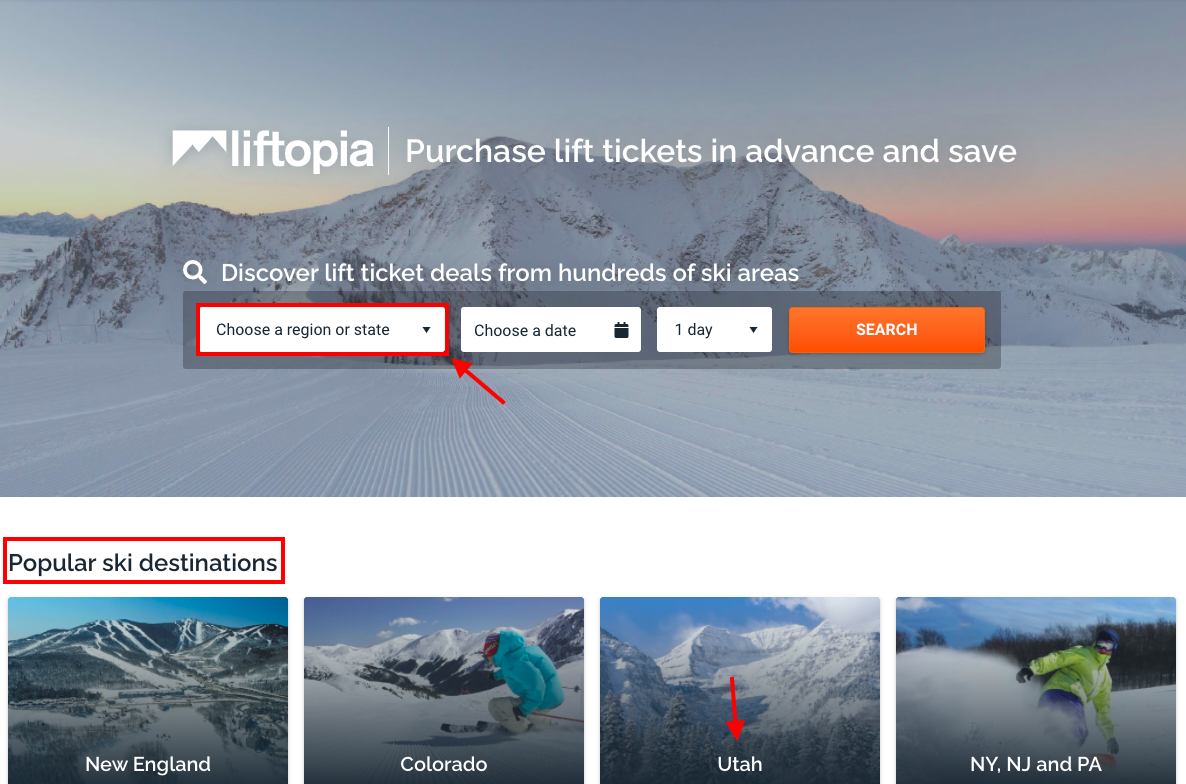
2. Once you have selected your region and have found the resort you would like to visit you will simply click your selection to review the ticket options.
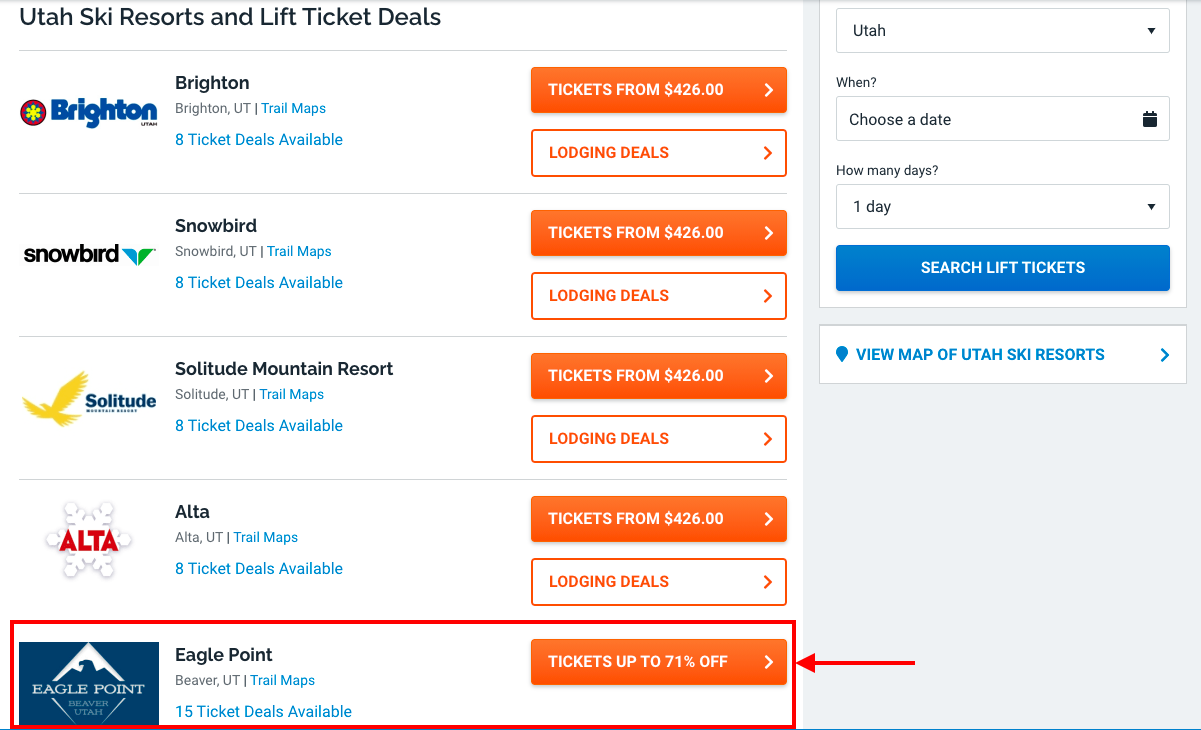
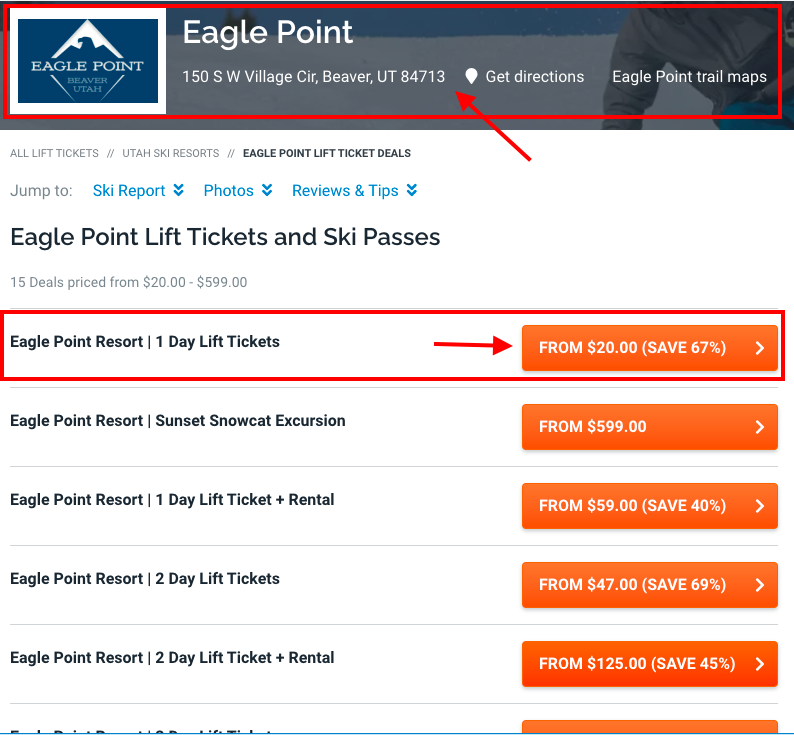
3. The top of the next page provides the resort's location and directions, this can be useful if you have not visited them before. Moving down you will be able to scroll and see the different ticket options available to make your selection.
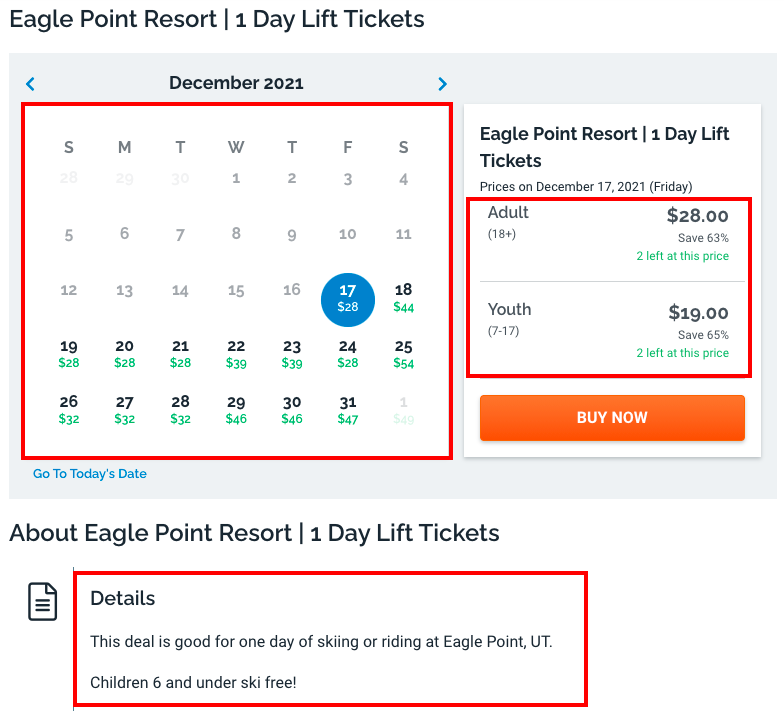
4. The Calendar displays available dates in black font with a visible price below, your current selection will show a blue circle over the date. Please note dates that are greyed out have either sold out or are not available for purchase. To the right of the calendar, you can see the different ticket types the resort sells, for instance, adult/youth/senior/student. Ticket descriptions or any additional info will be found below the calendar. The details section provides useful information and may elaborate on what your purchase includes.
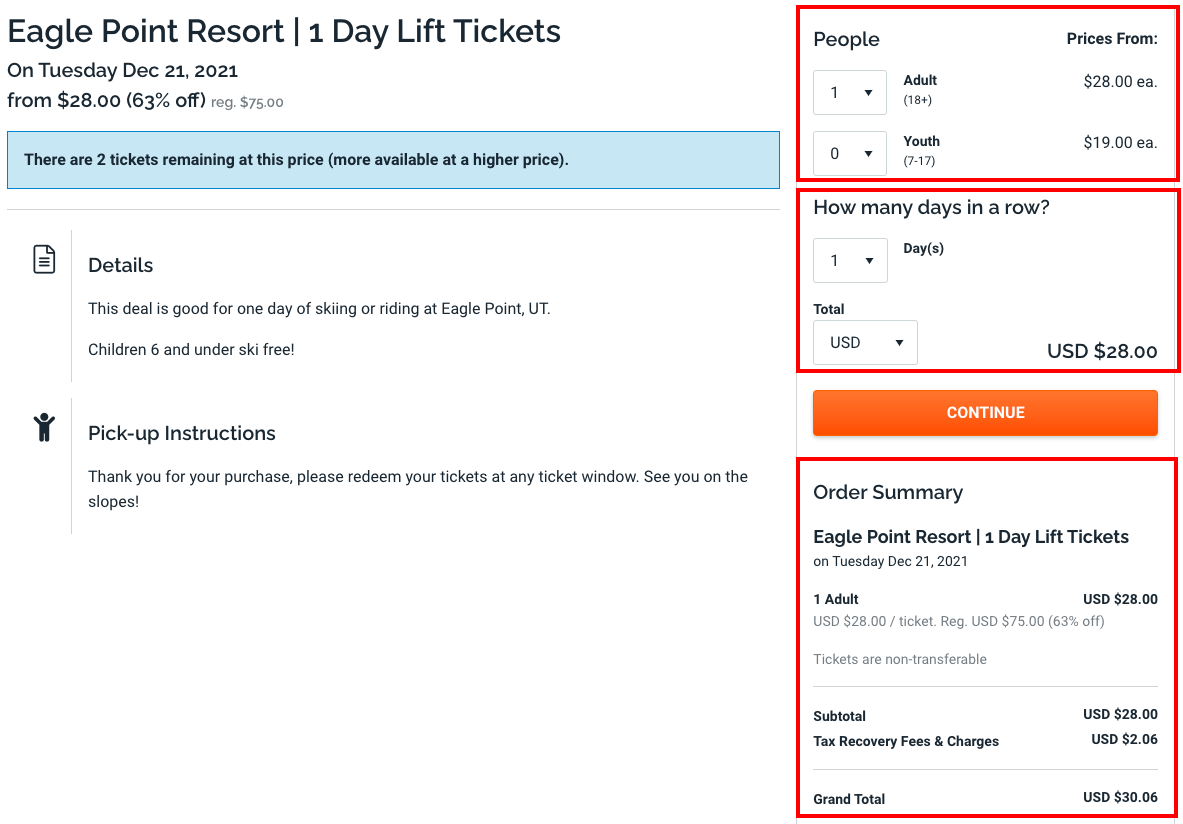
5. Once you selected your date and clicked "Buy Now" you will have the option to add additional guests, modify the number of days, and select the currency you would like to pay with. This page also provides your order summary that calculates your grand total for the selections made.
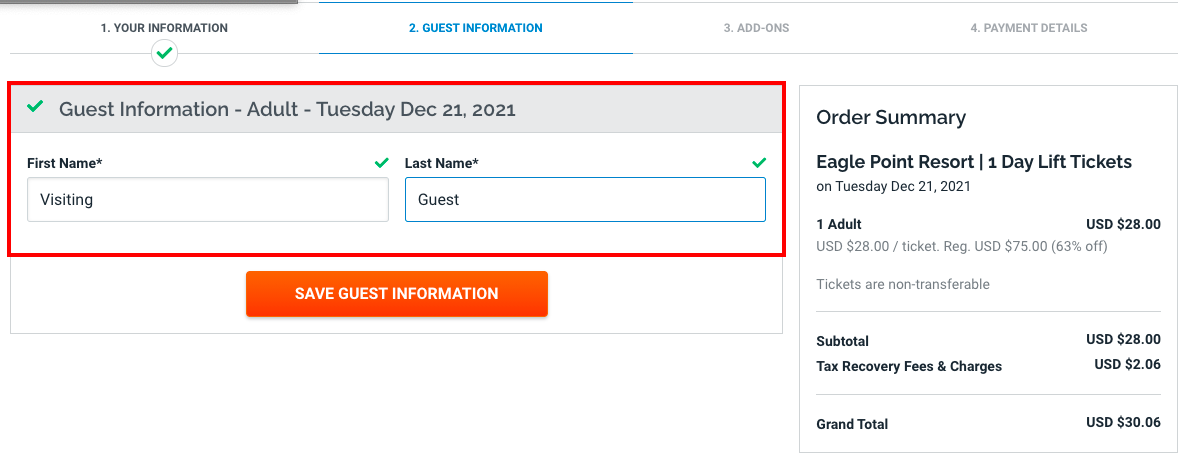
6. The next screen asks for the guest's first and last name. If you are buying a ticket for yourself you will have to enter your name again since you are the one visiting. If you are buying a ticket for someone else you will enter their name.
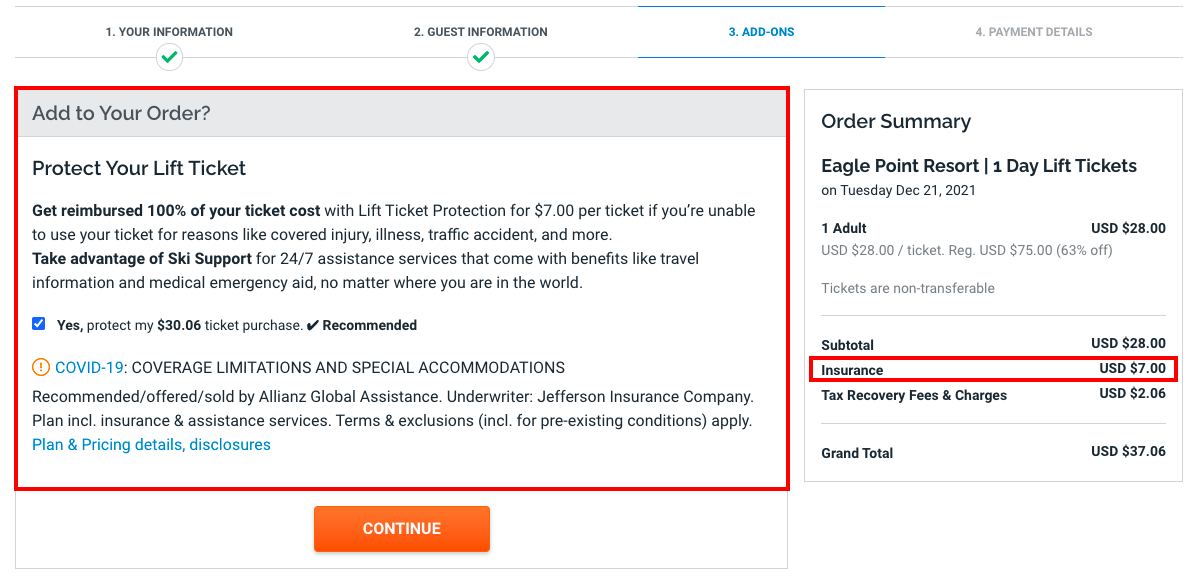
7. After saving guest information you will have the option to add any available add-ons such as insurance. If you decide to add to your order you will see the summary display the new total and cost of your add-on(s). (to learn more about our insurance provider please visit: Allianz Global insurance information)
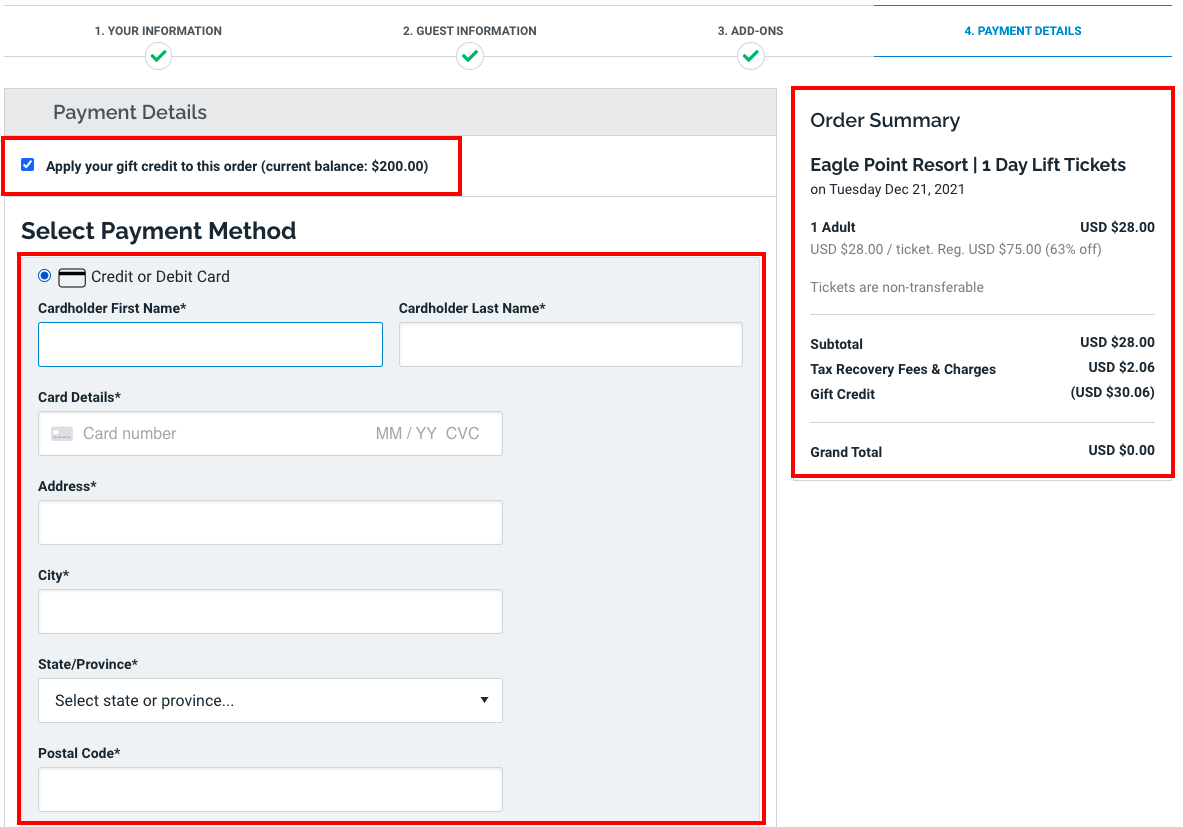
8. The final screen in the purchase path is the Payment Details page. If you will not be applying account credit to an order you will simply fill out the payment details section to complete the purchase. You will be able to use any available account credits by clicking the checkbox(sign in required), this is selected by default. If your credit amount covers the full cost you will see the summary update your grand total. Even if the order is covered in full your credit/debit card info will need to be filled out to complete the purchase.
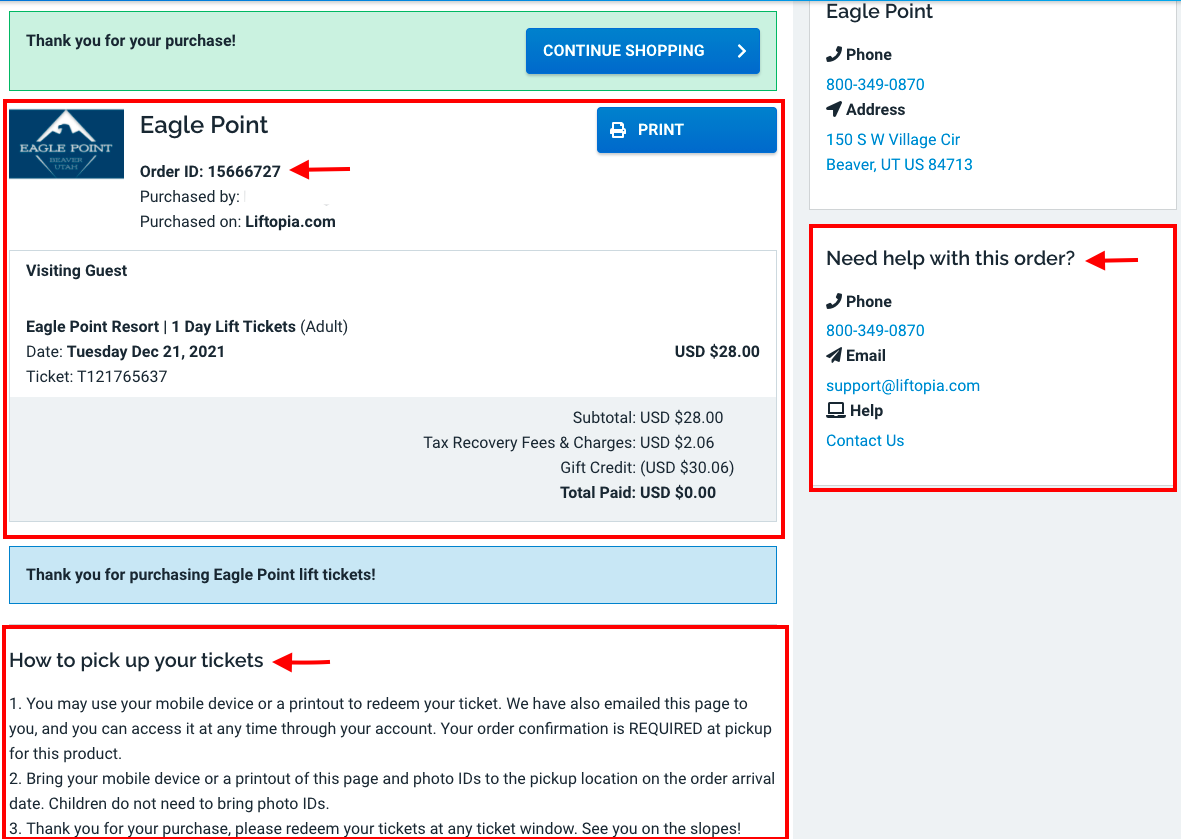
9. Your order confirmation is sent via email upon successfully completing your order. It is sent to the email address provided in the purchase path, it will also be displayed on your screen. You will be able to see your order details, get information on how to pick up your tickets, and have quick links to support.
Related Articles
How do I find tickets to a specific resort?
Why did I not receive an order confirmation?
Why do I keep receiving the error, “Oops we seem to have run into a technical issue?”
Comments
0 comments
Please sign in to leave a comment.